Scheduling reports
Scheduling allows to run reports automatically on specified time. The result of the report can be either emailed to users, or used to execute automation tasks, such as copying the report CSV file into a specific folder or uploading on FTP.
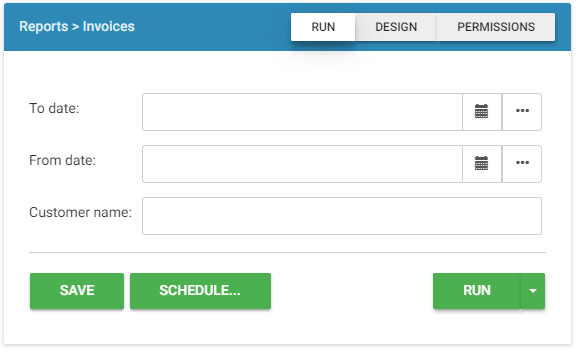
In order to schedule a report, the “Allow scheduling” checkbox should be enabled in the General section in the report Design View.
Once the scheduling is enabled, switch to Run view and click “Schedule” button.
Note
Scheduled reports will be executed only if all mandatory parameters are supplied. Therefore, If your report has mandatory parameters, you need to fill in the parameters, save the report, and then schedule the saved report.
When you click “Schedule” button, a popup dialog will appear. You can have more than one schedule for the report, by default a new empty schedule is created.
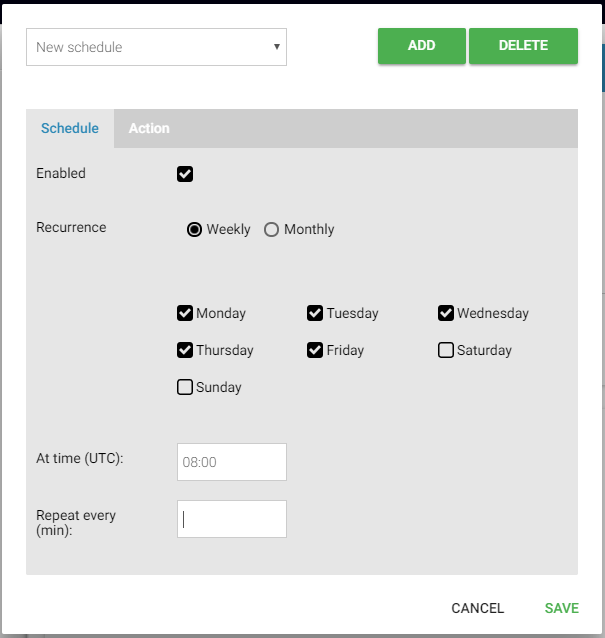
Schedule settings
- Enabled - enables or disables the schedule.
- Recurrence - select “Weekly” to run the report on specific days of week, or “Monthly” to run the report on specific days of month.
- At time (UTC) - specifies time when the report should be run on the selected days.
- Repeat every (min) - specifies interval in minutes, if the report should be run more often than once a day.
Action settings
Send by Email
Send an email with the report output to the selected recipients.
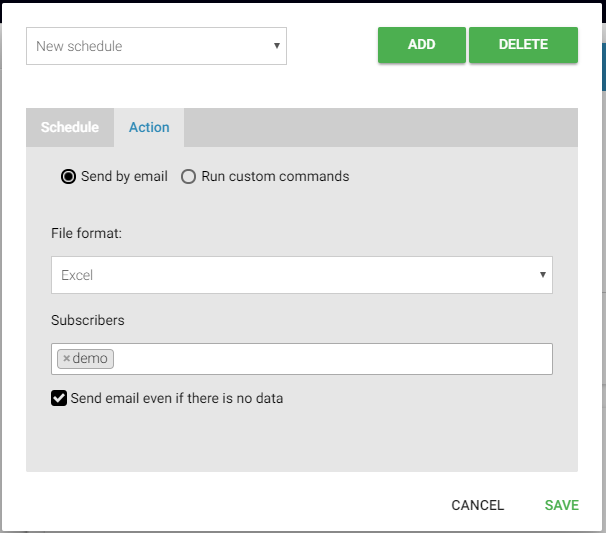
- File format - specifies how the report will be sent:
- Excel - an Excel file attachment
- CSV - a CSV file attachment (or ZIP with multiple csv files if the report has more than one output)
- InlineHTML - the repot table will be in the email body, no attachment.
- Subscribers - allows to select recipients for the email. Only users with “Run” permission for the report can be selected.
Note
Teams cannot be selected as recipients. Each user should be selected individually. If you are intending to send the report to a distribution list, create a new user with the distribution list email address and select this user as a recipient.
- Send email even if there is no data
- If checked, the email will be always sent, even if the report produced no output records.
- If unchecked, the email will be only sent if the report returns output records. This is extremely useful when setting up alerts and notification.
Run custom commands
Executes one or multiple commands, passing the report file name as an argument.
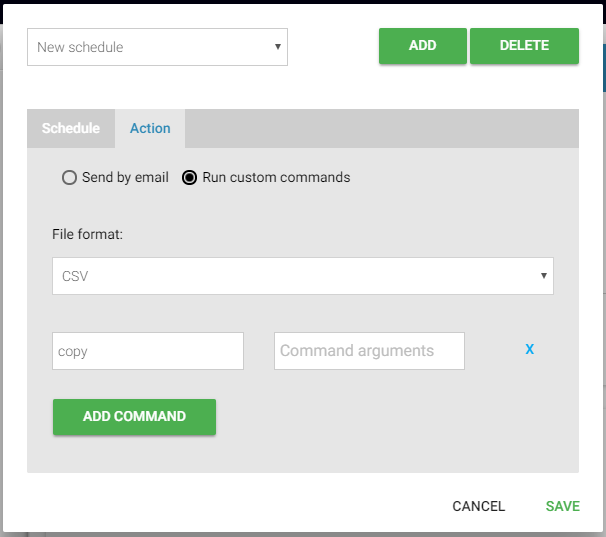
- File format - specifies how the report file will be generated:
- Excel - an Excel file attachment
- CSV - a CSV file attachment (or ZIP with multiple csv files if the report has more than one output)
- Command line - the OS command to invoke.
- Command arguments - the command line to pass to the command. The report filename will always be appended at the end after all other parameters.
Custom command example
If you want to save the report file in c:\backup folder:
In the “Command line” field type powershell
In the “Command arguments” field, type c:\scripts\copy.ps1 c:\backup
Create file c:\scripts\copy.ps1 with the following content:
Copy-Item $args[1] -Destination $args[0] -Force -Recurse
Note
Make sure that PowerShell script execution is enabled for x86. See this post for details.
When the scheduler executes a custom command, it invokes the command line and passes the arguments. The last argument always will be the generated file name. Therefore within your script $args[0] will contain “c:\backup”, and $args[1] will contain the generated report file name.
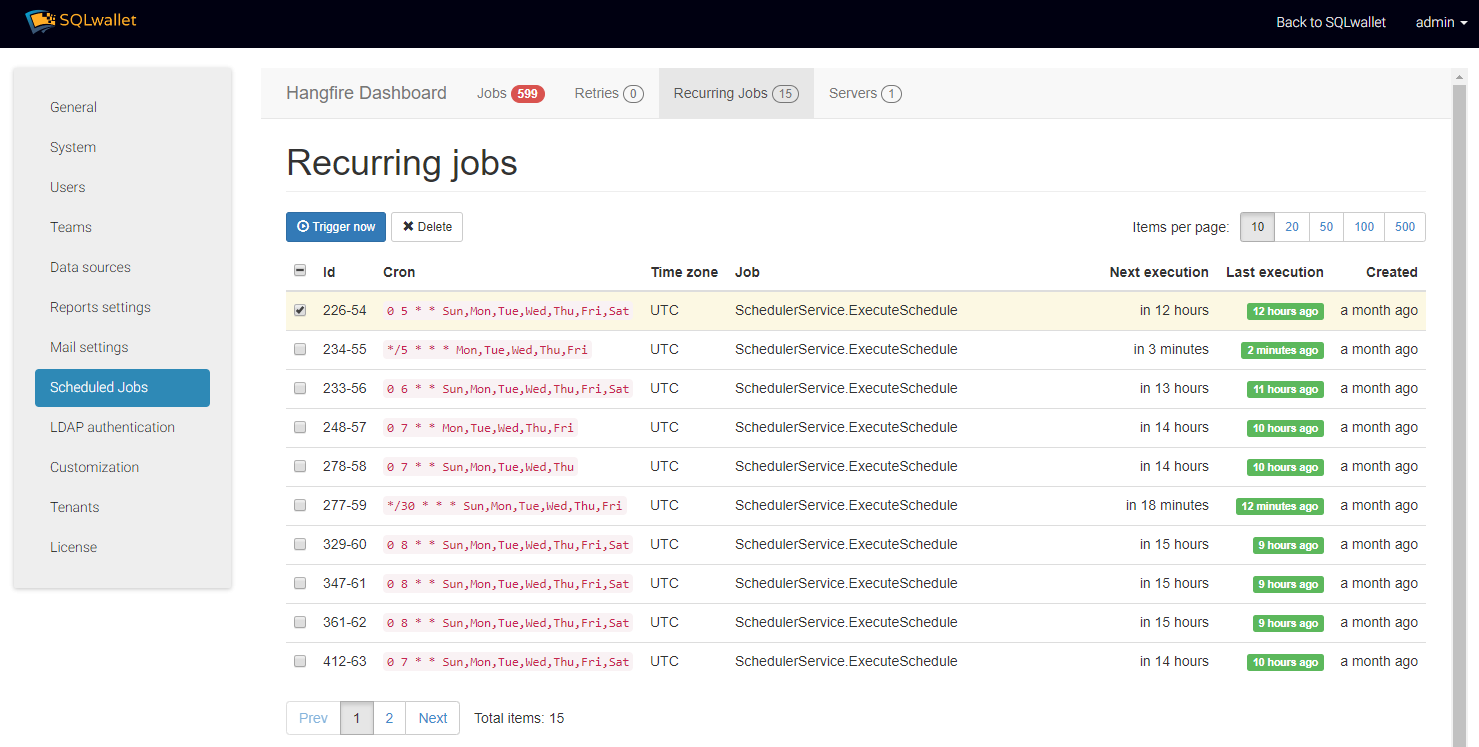
Testing the schedule
In order to test the scheduler without waiting for the scheduled time, go to Configuration and select “Scheduled Jobs” from the menu. Then select your schedule under Recurring Jobs and click “Trigger now”.